If you’re like most of us, you probably don’t think about your ball joints until something feels off. Maybe your suspension feels a little clunky when you roll over bumps, or it’s just squeaking more than it used to. Either way, when your suspension gets funky, it’s time to see if your ball joints are the problem.
We’ll tell you how to check ball joints on a UTV, whether you’re riding a RZR 1000, Can-Am X3, or just about any other four-wheeled, ball-jointed vehicle out there.
Let’s get started.
How to Check Ball Joints
Checking the ball joints on your UTV or car is easy and only requires a few tools.
Here’s what you’ll need:
A car jack
Chocks
A long pry bar or similar long tool
Here’s how to check your ball joints.
Pull your vehicle onto a flat surface and put chocks behind the rear tires.
Jack up the front end at an appropriate point on the frame. Only lift it enough to raise the front tires an inch or two off the ground.
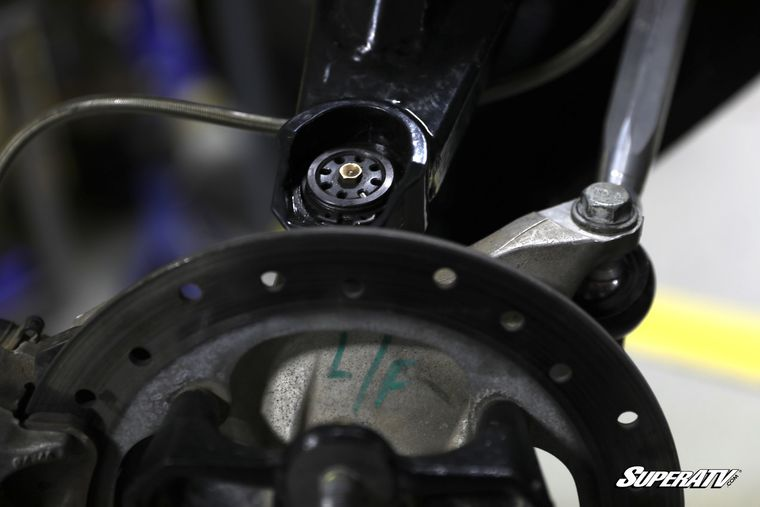
First, visually inspect your ball joints. Check to see if the rubber boots around the stud are cracked or leaking. Dust sticks to grease, so if you see grimy dust sludge around your boot and on your A-arms, that’s a good sign that they’re leaking. If they are, it’s time to replace them.
Now grab your tire at the 12 and 6 o’clock positions and try to rock it back and forth. It shouldn’t move, and if it does, meaning there’s play between your spindle and A-arms, it’s time to replace your ball joints. If there’s play between your wheel and your spindle, you might have a wheel bearing issue instead.
For a final test, you can use a long pry bar (or any bar really) to pry up on the bottom of the tire. If the wheel moves up and down, you guessed it, it’s time to replace your ball joints.
When you remove your ball joints, you can confirm your findings. The studs should be stiff and difficult (but not impossible) to move by hand. And there should be absolutely no up and down play on the studs.
Don’t wait to replace a bad ball joint. A bad ball joint is more likely to break and leave you stranded on the trail in the best-case scenario. It’s easy to rack up a lot more damage than that when one breaks though.
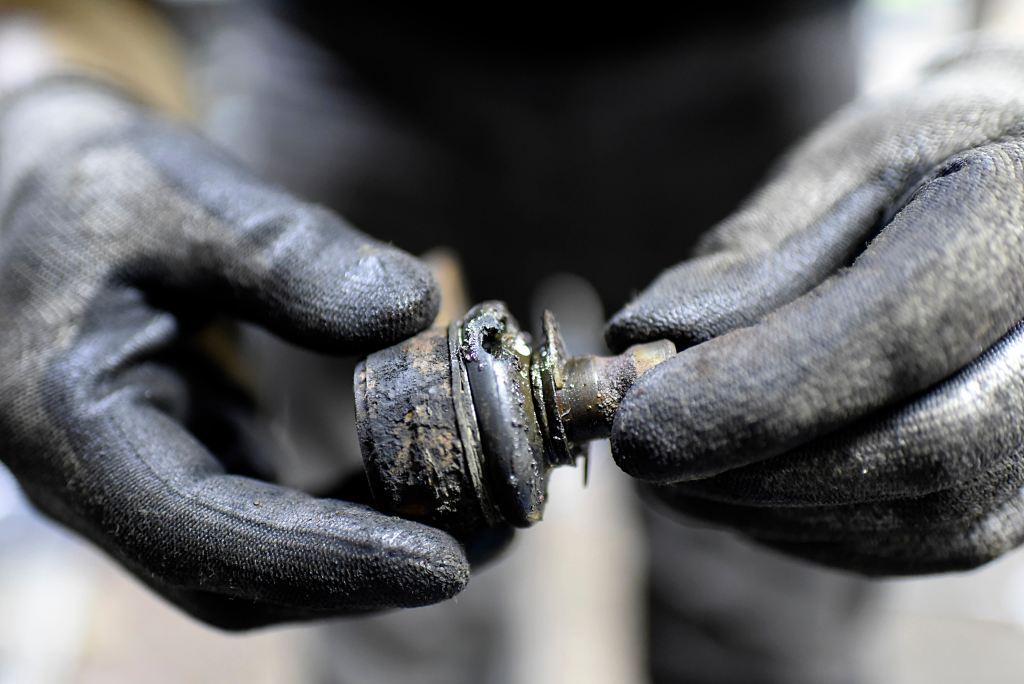
This is what a bad ball joint looks like. The rubber boot is broken and it’s covered in grease. If you see this, you’re done checking. Replace it ASAP.
Get Better Ball Joints
If you’re replacing your ball joints, you have the perfect opportunity to upgrade. Most of our ball joints let you take them apart, regrease them, and tighten them to make up for any wear over time. That means they’ll last way longer than a non-adjustable ball joint.
Here’s what we have on offer.
Standard-Duty Ball Joints—Our standard-duty ball joints are designed to match OEM. For many models, they’re actually a smidge stronger than stock thanks to our redesigned studs that are thicker at the base. But our standard-duty ball joints cannot be greased or tightened.
Heavy-Duty Ball Joints—Our heavy-duty ball joints are a lot stronger than stock. That’s because they have studs that are thicker at the base, and they’re made with 4340 chromoly steel. Our heavy-duty ball joints are greaseable and can be tightened. When you start noticing play in your suspension, all you have to do is pop them out, grease them up, and tighten the base to get them operating like new again.
Super-Duty Ball Joints—Our super-duty ball joints are just like our heavy-duty joints, except the studs are made from hardened and black-oxide coated 300M steel. In case you don’t know, 300M is about as strong as it comes. It’s used in aircraft landing gear, missiles, and, of course, motorsports. These joints are just as easy to tighten and grease too.
Keller Ball Joints—Keller Ball joints work differently, and they’re as strong as they get. They press in, but the back of the housing threads on, so the whole thing secures to your A-arms like a bolt and nut. That makes them virtually impossible to pull out, and they’re made from 4340 steel, so you’re not likely to break it any other way either. And just like our other high-end ball joints, it can be greased and tightened if the stud loosens.
We assemble our Keller Ball Joints in house by hand. That means you can disassemble them by hand too—perfect for tightening and greasing them if they start to get loose. Plus, you can rebuild Keller Ball Joints too. Photo by SuperATV
How Long Do Ball Joints Last?
If you’re wondering how long your ball joints should last, there’s no easy answer unfortunately. The durability of your ball joints depends on your specific UTV and your ride style. But if you use a set of our tougher adjustable ball joints, you can count on them lasting way longer than any stock replacement.
If you want to dig in to all the variables, read more about how long RZR ball joints last. The advice there applies to most UTVs.
Ready to Upgrade Your Ball Joints?
Now that you know how to check your ball joints, you should know if you need to replace them or not. Check out all our SuperATV ball joints. We have them for tons of different models so check it out even if you drive an old or obscure ATV or UTV.
And if you’re still confused about ball joints in general, you can read our ball joint guide to get a better understanding.
Get upgraded with SuperATV, get riding, and quit worrying about your ball joints.
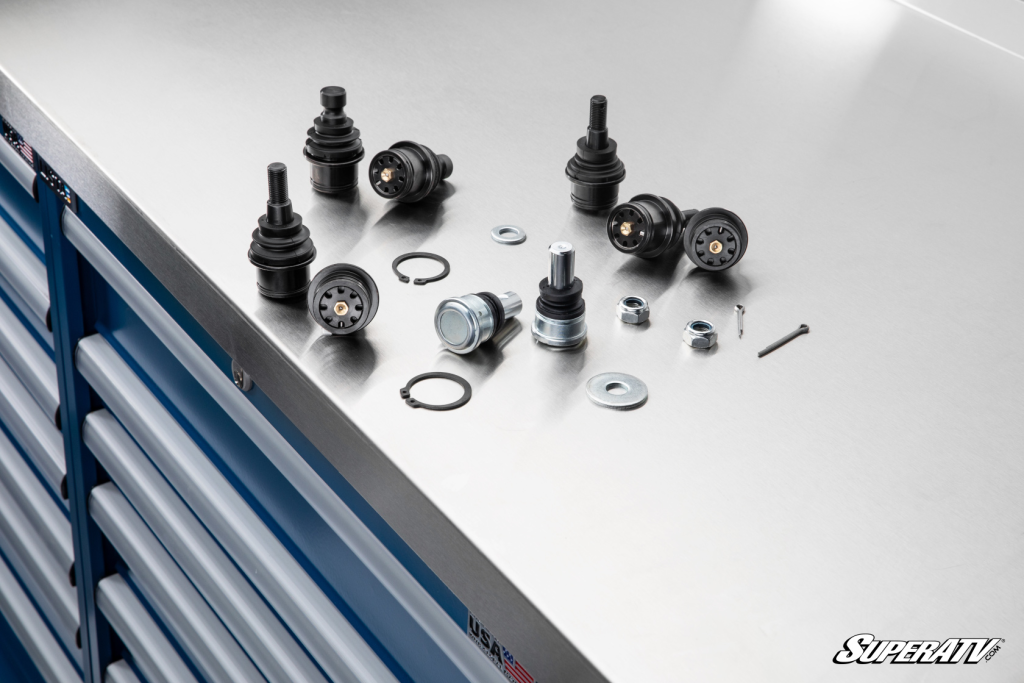
We have lots of ball joints for tons of different UTV models. Upgrade to one of your greaseable and adjustable ball joints to make your ball joints last longer. Photo by SuperATV